How to Connect Puppeteer to Incogniton Manually for Web Scraping
Puppeteer excels at automating browser interactions, while Incogniton enhances your privacy with robust anti-fingerprinting and Web Unblocker technologies. Together, they help you scrape efficiently and securely without compromising on anonymity.
This guide covers manual Puppeteer connection. For a more seamless integration, we recommend you use our SDKs. See guides here.
This guide takes you through the step-by-step approach to professional web scraping using the Incogniton API with Puppeteer in a Node.js project.
Prerequisites
To be able to follow along smoothly, ensure you have the following in place:
- A Node.js environment set up on your computer.
- Basic knowledge of JavaScript.
- Familiarity with using the terminal or command line.
Dynamic Content: A Quick Overview
Dynamic content refers to webpage content that is not present in the initial server-rendered HTML, but is instead loaded or modified using client-side javascript logic. Simply put, content that your computer runs in your browser using Javascript.
Examples include lazy-loaded images, infinite scrolling, and content rendered by Single-page applications (SPAs).
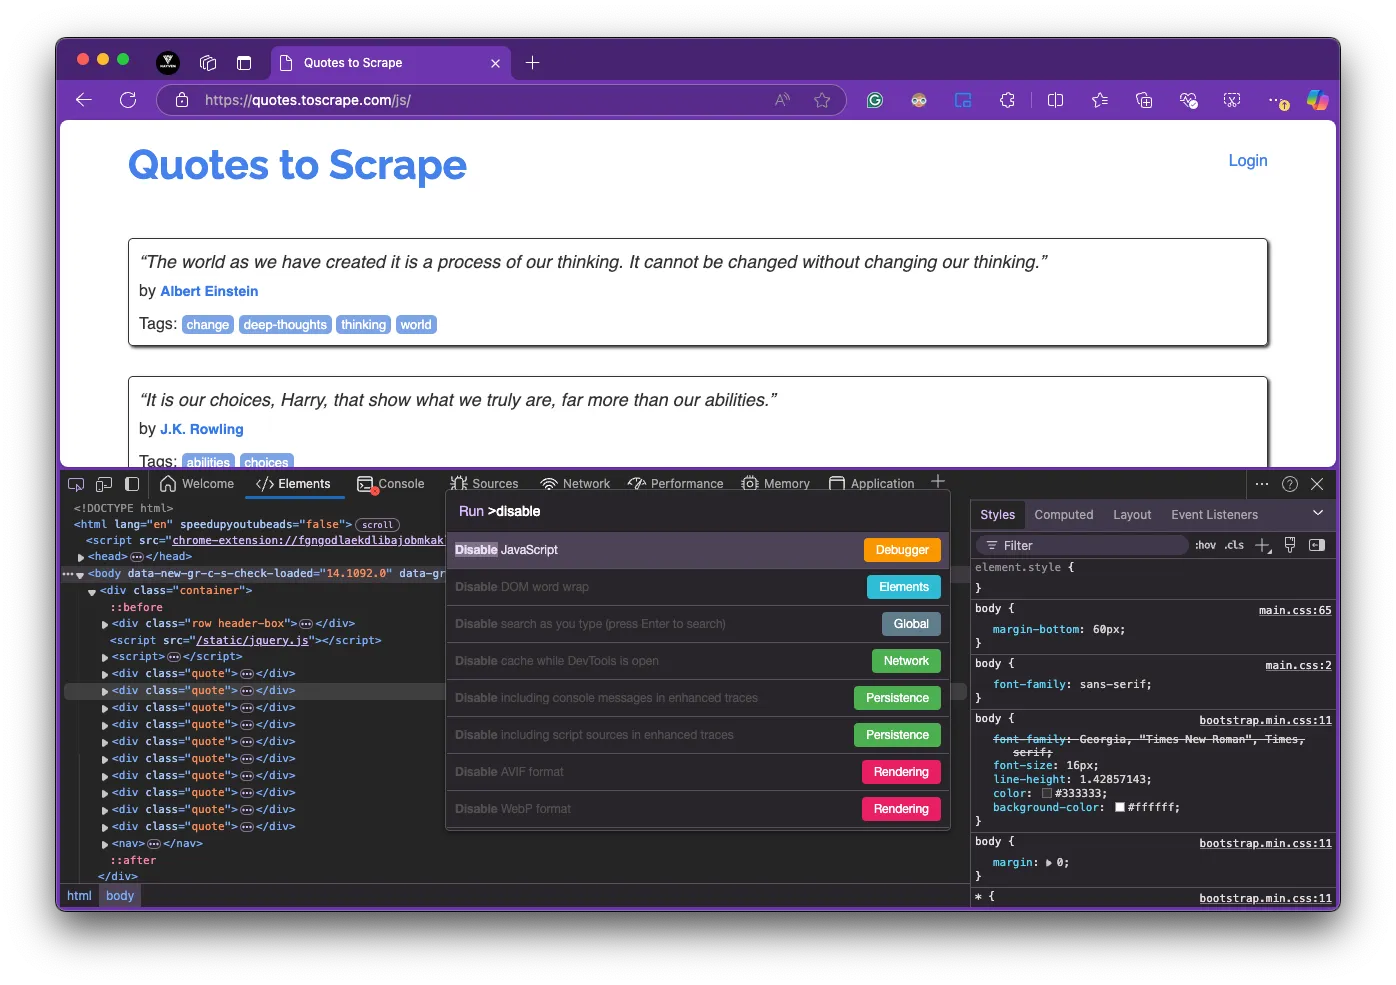
One way to verify that a page is dynamically rendered is to disable Javascript in your browser, using Chrome DevTools. See the steps below:
- Open Chrome DevTools (
F12). - Press
Ctrl + Shift + PorCmd + Shift + Pon Mac to open the Command Menu. - Enter "Disable JavaScript" in the search bar and select the corresponding option.
- Reload the page and observe the difference. JavaScript-generated content will not be populated.
To return to the default state, close the DevTools panel and reload the page once again.
Now, onto the tools powering our scraping workflow. Here's an brief overview of Puppeteer and Incogniton:
Puppeteer
Puppeteer is a JavaScript library that automates Chrome browsers via the Chrome DevTools Protocol (CDP), enabling programmatic executions and user interaction simulations such as clicking or typing.
Incogniton Browser
Incogniton is an anti-detect browser with built-in Puppeteer integration, providing anonymity for web scraping and other automation tasks.
The Incogniton-Puppeteer integration allows you to launch automated browser sessions within fully isolated profiles, each with a unique browser fingerprint, enabling both headless automation and advanced anti-detection capabilities.
How to Scrape Dynamic Content: Step-by-Step
The following steps outline the process to manually set up and run a javascript-rendered content scraping workflow with Incogniton and Puppeteer:
Note: Some Incogniton API features are only available within the premium packages. Kindly check the plans to see what features are included in each package.
Install and Set Up Incogniton
The first step is to install the Incogniton app and create an account. If you already have an Incogniton account, you can skip this step. Otherwise, follow the instructions below:
- Visit the Incogniton download page. Select the version for your device (Windows or macOS) and download the app.
- Install the app on your computer. While it's installing, navigate to the website, choose a plan, and create an account.
- Upon installation, sign in with your credentials.
- Navigate to profile management and create a new profile.
- Set up your proxy for IP rotation; Incogniton provides a suite of proxy deals.
- Complete the profile creation process and get the browser profile ID.
Keep the Incogniton Desktop app open and ensure the profile status shows
Ready and not Launching or Syncing before you run your scripts.
Connecting Puppeteer to the Incogniton API
Create a file named anon-scraper.js in your project folder. Then, install the puppeteer-core library:
npm install puppeteer-core
Puppeteer-core instead of Puppeteer because the former doesn’t bundle Chromium, making it the ideal choice when you're connecting to an existing browser like Incogniton.
Next, use the puppeteer.connect() function to connect to the already-running Incogniton browser via the provided DevTools URL returned by the Launch Puppeteer endpoint, allowing Puppeteer to take control of the session. See a demonstration below:
import puppeteer from 'puppeteer-core'

// Function to introduce a delay
const delay = (ms) => new Promise((resolve) => setTimeout(resolve, ms))

// Non-headless launch
const startIncogniton = async ({ profileId }) => {
  try {
    const launchUrl = `http://localhost:35000/automation/launch/puppeteer`
    const requestBody = {
      profileID: profileId,
    }

    // Make a POST request with body data
    const response = await fetch(launchUrl, {
      method: 'POST',
      headers: {
        'Content-Type': 'application/json',
      },
      body: JSON.stringify(requestBody),
    })

    const data = await response.json()
    const { puppeteerUrl } = data

    // Wait for the browser to launch
    console.log('The Incogniton browser is launching...')
    await delay(30000) // await initial boot process

    // Connect Puppeteer to the launched browser
    const browser = await puppeteer.connect({
      browserURL: puppeteerUrl,
      acceptInsecureCerts: true,
    })

    return browser
  } catch (error) {
    console.error('Error starting Incogniton session ->', error)
    throw error
  }
}
For headless mode—better suited for large-scale scraping, modify the request body to include the customArgs parameter as shown below:
// Headless launch
const startIncogniton = async ({ profileId }) => {
  try {
    const launchUrl = `http://localhost:35000/automation/launch/puppeteer`;
    const requestBody = {
      profileID: profileId,
      customArgs: '--headless=new', // use headless mode
    };

    // Rest of the function remains the same...
  }
};
The example uses port 35000, which is Incogniton’s default. If you’re using a
different port, update the launchUrl accordingly.
To verify that your anti-detect browser instance is well-configured and masking your identity as intended, you should run a fingerprint test. Below is an example using the IPHey test, which reveals details about your IP address and browser fingerprint.
const incognitonProfileId = 'YOUR_INCOGNITON_PROFILE_ID'

const ipheyTest = async (browser) => {
  try {
    const page = await browser.newPage()
    // Navigate to the IPHey website and wait till zero network requests
    await page.goto('https://iphey.com/', { waitUntil: 'networkidle0' })

    // Check for 'trustworthy status' in the DOM
    const ipResult = await page.$eval(
      '.trustworthy-status:not(.hide)',
      (elt) => (elt ? elt.innerText.trim() : ''),
    )

    console.log('IP Result ->', ipResult) // expected output: 'Trustworthy'
    await page.close()
  } catch (error) {
    console.error('Error during IPHEY test ->', error)
  } finally {
    await browser.close()
  }
}

// Execute iphey test
const testIncognitonProfile = async () => {
  const browser = await startIncogniton({ profileId: incognitonProfileId })
  await ipheyTest(browser)
}

testIncognitonProfile()
All things being equal, the ipheyTest() function should return 'Trustworthy', indicating that your fingerprint appears clean and is not raising red flags typically associated with automation or spoofing. Other possible results are "Suspicious" or "Not reliable".
Scrape a Dynamically Loaded Page
To demonstrate scraping client-side rendered data, I'll use the JS-generated content page generated version of the Quotes to Scrape website.
The snippet below uses the Puppeteer-Incogniton API, via the startIncogniton() function you created earlier, to scrape a page in three steps: Navigate to a dynamically rendered page, wait for the content to fully render, and extract quotes and authors from the DOM.
const scrapeDynamicContent = async (profileId) => {
  try {
    // Start Incogniton browser
    const browser = await startIncogniton({ profileId })
    const page = await browser.newPage()

    // Navigate to the dynamic page with client-side rendering
    await page.goto('https://quotes.toscrape.com/js/', {
      waitUntil: 'networkidle0',
    })

    // Extract quotes and authors from dynamically rendered content
    const quotes = await page.$$eval('.quote', (elements) =>
      elements.map((element) => ({
        text: element && element.querySelector('.text').innerText.trim(),
        author: element && element.querySelector('.author').innerText.trim(),
      })),
    )

    console.log('Extracted Quotes ->', quotes)

    // Close the browser after scraping
    await browser.close()
  } catch (error) {
    console.error('Error scraping dynamically loaded content ->', error)
  }
}
Pay attention to the use of .$$eval() instead of the .$eval() method. It indicates that you intend to extract multiple quotes, not just a single element.
The resulting output data should look like this:
Extracted Quotes -> [
  {
    text: '"The world as we have created it is a process of our thinking. It cannot be changed without changing our thinking."',
    author: 'Albert Einstein'
  },
  {
    text: '"It is our choices, Harry, that show what we truly are, far more than our abilities."',
    author: 'J.K. Rowling'
  },
  {
    text: '"The person, be it gentleman or lady, who has not pleasure in a good novel, must be intolerably stupid."',
    author: 'Jane Austen'
  },
  // other quotes...
]
Handle Paginated Data Scraping
In most day-to-day use cases, web scraping would typically involve discovering links on a page and recursively following them to additional pages, continuing this process until all relevant data has been gathered.
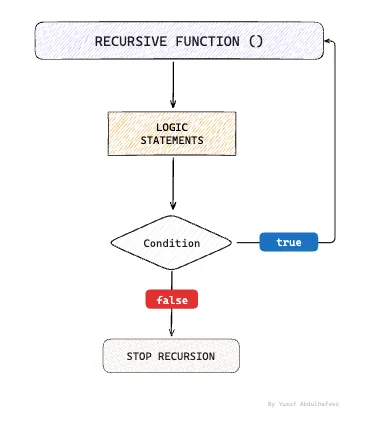
In this section, you'll build a recursive function that navigates through all available pages on the site and collects the quotes from each one, using the quotes.toscrape.com/js page as the data source.
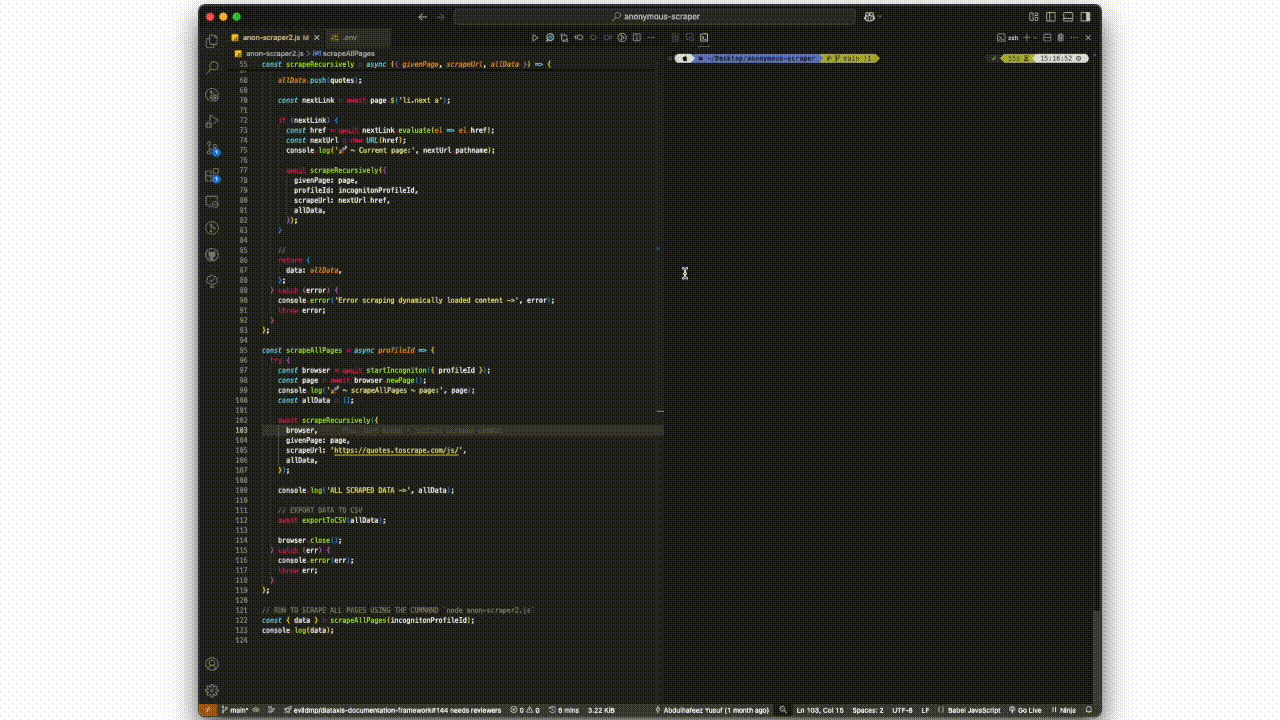
const scrapeRecursively = async ({
browser,
givenPage,
scrapeUrl,
allData,
}) => {
try {
// Use the provided page
const page = givenPage
await page.goto(scrapeUrl, { waitUntil: 'networkidle0' })
// Extract quotes from current page
const quotes = await page.$$eval('.quote', (elements) =>
elements.map((el) => ({
text: el.querySelector('.text').innerText.trim(),
author: el.querySelector('.author').innerText.trim(),
})),
)
// Add current page data to the collection
allData.push(...quotes)
// Look for next page link
const nextLink = await page.$('li.next a')
// If there's a next button, continue scraping
if (nextLink) {
const href = await nextLink.evaluate((el) => el.href)
await scrapeRecursively({
givenPage: page,
scrapeUrl: href,
allData,
})
}
return {
data: allData,
}
} catch (error) {
console.error('Error scraping dynamically loaded content ->', error)
throw error
}
}
// Usage example
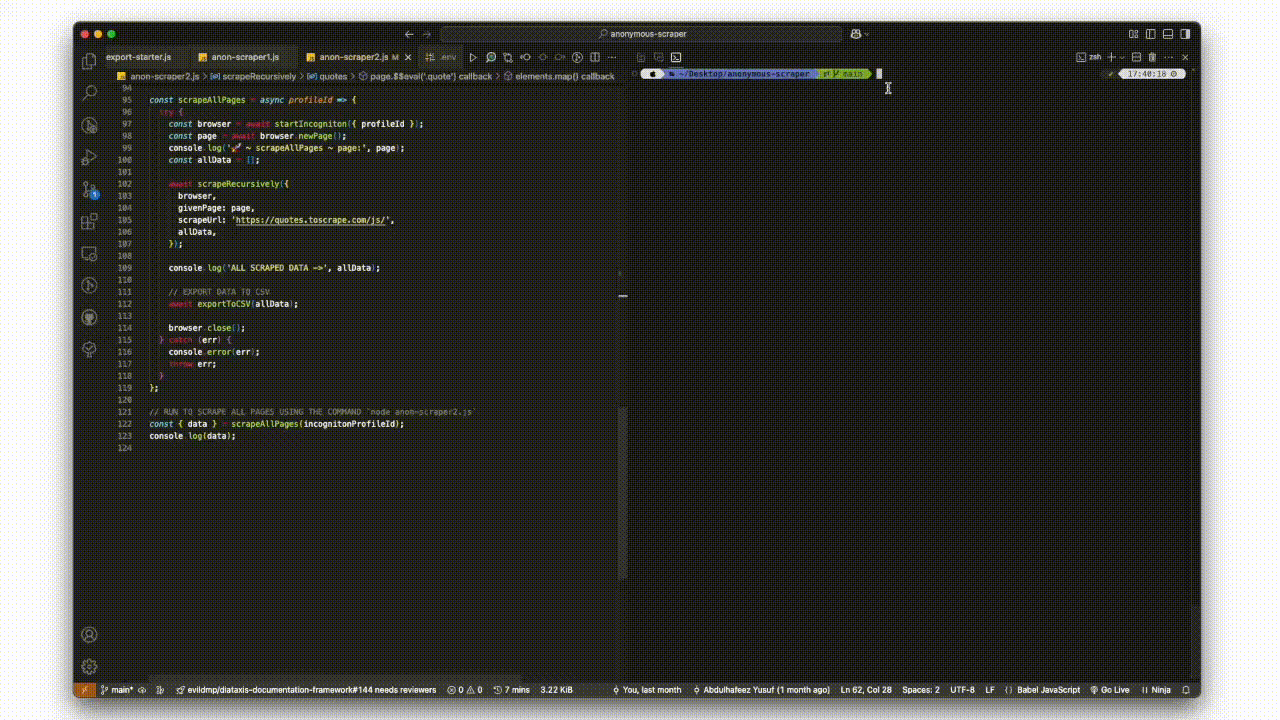
const scrapeAllPages = async (profileId) => {
try {
const browser = await startIncogniton({ profileId })
const page = await browser.newPage()
const allData = []
await scrapeRecursively({
browser,
givenPage: page,
scrapeUrl: 'https://quotes.toscrape.com/js/',
allData,
})
console.log('ALL SCRAPED DATA ->', allData)
browser.close()
} catch (err) {
console.error(err)
throw err
}
}
The function navigates to the URL, waits for the page to load, and extracts all quotes. Next, it checks for a "next page" link using the li.next a selector. If found, it constructs the full URL and recursively calls itself to scrape data from the next page until there are no further pages to scrape.
There you have it! You have successfully scraped a website anonymously by connecting your Incogniton antidetect browser to Puppeteer via Chrome DevTools Protocol (CDP). And while this guide is for Puppeteer, the same CDP url can also be used to integrate Incogniton with other CDP-compatible tools like Playwright.
You can check out the complete source code for this tutorial here.
Incogniton's real fingerprints ensure your automation software doesn't come off as a bot, so as long as you stay responsible and ethical in its use, you're unlikely to get hit with annoying anti-bot prompts like CAPTCHAs.
In those rare cases where you do get one, I'll dive into the solutions to that in a future article.
Conclusion
You have now learnt how to scrape dynamically loaded websites while maintaining privacy and security using Incogniton and Puppeteer. This approach helps you avoid being detected as a bot in most cases, reducing the likelihood of encountering CAPTCHAs and other anti-bot measures.
However, while Incogniton's real fingerprints make your automation software less likely to be detected as a bot, you should always use these tools responsibly. Be mindful of each website's terms of service and uphold ethical scraping practices.
- Respect robots.txt files
- Implement reasonable rate limiting
- Only collect publicly available data
- Don't overload servers with requests
Enjoy scraping anonymously. 🚀